


Most consumer golf rangefinders tolerate a non-contact magnetic mount without issue, but strong neodymium magnets held directly against the housing can disrupt internal sensors or throw off distance readings. The safe practice is simple: use a purpose-built mount, keep the magnet away from the lens and compass module, and always add a tether as backup. Manufacturer guidance and testing from various brands both point to the same rule of thumb.
TL;DR:
- Magnets held directly against the rangefinder can disrupt critical sensors, especially the compass, internal timing circuitry, and display, causing inaccurate readings or drift.
- Buffering magnets with sleeves or straps reduces interference risk by increasing the distance between the magnet and electronic components, with a separation of a few centimeters often eliminating issues.
- The strength and contact area of the magnet matter more than grade; wider, flatter contact surfaces distribute force and minimize sensor disturbance, especially when mounted on carts or straps.
- Testing your rangefinder with a known distance after attaching a magnetic mount helps verify the absence of drift or erratic compass behavior before use during a round.
- Always include a tether with magnetic mounts, as accessories can fail, and proper placement away from buttons and sensors ensures safe, reliable use on the course.
Table of Contents
- Magnetic Accessory Types: Straps, Sleeves, Clips, and Cart Mounts
- Which Rangefinder Parts Do Magnets Actually Affect?
- How to Attach a Magnet to Your Rangefinder Safely
- Magnet Specs That Actually Matter for Golf Use
- Pacemakers, Electronics, and Safe Magnet Storage
- What to Check Before You Buy a Magnetic Rangefinder Mount
- How Aiming Fluid Golf Approaches Magnetic Accessory Design
- The Overlooked Trade-Off Nobody Talks About
- Get a Magnetic Mount Built Around Contact Area, Not Just Strength
- Sources
Magnetic Accessory Types: Straps, Sleeves, Clips, and Cart Mounts
Golfers attach rangefinders with magnets in four common ways, and each one solves a slightly different problem. Understanding what each accessory actually does helps you match the hardware to your bag setup instead of guessing.
Strap and wrap holders loop around the rangefinder body and use a flat magnetic panel to stick to a cart frame or bag rail. These distribute magnetic force across a wider surface, which reduces the raw strength needed per square inch. Retail listings for products like the STICKIT Magnetic Rangefinder Strap market an “industrial-strength neodymium bar magnet” built into an adjustable strap, letting the device fit models that never shipped with a factory magnet.
Magnet sleeves slide over the rangefinder like a case, with the magnet embedded in the fabric or rubber shell rather than touching the device directly. This adds a buffer layer between the magnet and the electronics, though it also adds bulk.
Magnetic clips are smaller, quick-release units meant for clothing, a harness, or a bag strap. Products such as the Magnus clip prioritize fast one-handed access over maximum holding force, which matters when you are lining up a shot on the clock.
Cart-mounted holders and metal bag clips skip the wrap entirely. A metal plate gets fixed to the cart, and the rangefinder’s own magnet (factory or aftermarket) snaps to it directly.
Trade-offs to weigh before picking one:
- Strap and sleeve designs cover more surface area but can block side buttons if sized wrong.
- Clips give the fastest draw but rely on a smaller contact patch, so they lose holding power on rough terrain or a bumpy cart ride.
- Cart mounts free up your pocket and pouch space but leave the rangefinder exposed if the cart hits a curb hard.
- None of these accessory types replace a tether. Every one of them is a convenience layer, not a retention guarantee.
Which Rangefinder Parts Do Magnets Actually Affect?
The real interference risk is narrow. It centers on three components: the electronic compass or orientation sensor, the display driver, and (on some higher-end models) internal timing circuitry used for laser distance calculation. Everything else in a typical rangefinder, the lens, the laser diode, the battery contacts, has little to no magnetic sensitivity.
Compass and orientation sensors are the most exposed because they are built to detect small magnetic fields by design. A strong magnet held close enough will read as noise, not signal, and the sensor cannot tell the difference between the Earth’s field and a neodymium disc sitting half an inch away. MagnetCy’s testing on rangefinder interference found that strong magnets brought within a few centimeters can disrupt sensors and, in some cases, cause lasting inaccuracy if left in prolonged contact.
By the Numbers: Interference risk drops off sharply with distance. A magnet strong enough to cause a problem at direct contact often has no measurable effect once it’s separated by even a couple of centimeters of case material, which is exactly why sleeve and strap designs that buffer the magnet from the electronics tend to perform more predictably than bare magnet-to-metal contact.
Watch for three symptoms if you suspect a magnet is causing trouble:
- Compass drift. The heading or slope-direction indicator (on models that have one) reads inconsistently between shots taken from the same spot.
- Inconsistent distance readings. The same target measured twice in a row returns numbers that differ by more than the device’s stated accuracy tolerance.
- Display artifacts. Flickering, ghosting, or a frozen readout right after the rangefinder has been near the magnet, especially on models with electronic (rather than optical) reticles.
Not every device is equally exposed. Supplier testing summarized by AITE Optical on magnetic field effects found that most consumer pin-seeking models hold up fine under normal magnetic exposure, the kind you’d get from a properly sized mounting magnet. The risk shows up mainly with unusually strong magnets, direct and sustained contact, or older units that weren’t tested against magnetic interference during development.
Pro Tip: Before trusting any magnetic mount for a full round, run a two-minute test at home. Measure a known distance, like your driveway or a marked spot in the yard, before attaching the magnet and again after. If the reading shifts by more than a yard or two, or the compass needle behaves erratically, that mount and magnet combination isn’t a good match for your model.
If a test does turn up drift, most rangefinders with electronic compasses include a manual recalibration routine in the settings menu. Run it after any extended magnetic exposure, not just once at setup, since some sensors can pick up a slight residual bias over time.
How to Attach a Magnet to Your Rangefinder Safely
Getting a magnetic mount right is less about brute strength and more about placement. Follow this sequence and you’ll avoid the two most common mistakes: blocking a button you need mid-swing and mounting a magnet close enough to the sensor to cause drift.
Preparation, before you attach anything:
- Check your rangefinder’s manual for any note about magnetic accessories or factory-installed magnets. Some models already ship with a small magnet built into the housing, and stacking a second one on top can overdo it.
- Look for existing metal contact points on the device housing. These are usually where the manufacturer intended a magnet to sit, and they tend to be farther from the compass module than the center of the case.
- Match magnet size to the accessory, not the other way around. A magnet sized for a bag clip is often too small for a cart mount and too large for a sleeve.
Mounting steps:
- For a strap: Wrap the strap around the body so the magnetic panel sits flat against the back or bottom, away from the top-mounted power and mode buttons. Pull it snug but not so tight it distorts the eyecup or lens housing.
- For a sleeve: Slide the rangefinder in lens-first, checking that the side buttons line up with any cutouts in the fabric. A sleeve that covers your ranging button defeats the purpose of quick access.
- For a clip: Attach the clip to a stable point on clothing or a harness strap, ideally close to chest height, then snap the rangefinder on with the lens facing outward for a fast draw.
- For a cart mount: Fix the metal plate to a flat section of the cart frame, away from any onboard electronics like a GPS unit or scorekeeping display, then confirm the rangefinder clicks in securely from multiple angles.
Testing routine, every time you switch mounts:
Some users on forums like Archery Talk’s thread on magnetic holster issues report zero problems with magnetic holsters over years of use, while others specifically flag interference with nearby navigation gear. That split is exactly why a quick check matters before you rely on a new setup during a round.
- Range a known distance, a yardage marker, your own driveway, anything with a fixed number you can verify.
- If your device has a compass or slope readout, check it against a known heading or a flat lie you’ve measured before.
- Press every button once with the magnet attached to confirm nothing is blocked or muffled by the accessory material.
Pro Tip: Some golfers online have asked about removing the metal backing plate on a rangefinder and mounting the magnet directly to save weight. Community advice on threads like this consistently comes back to the same point: check with the manufacturer first, since removing factory hardware can void a warranty or expose internal components the housing was designed to protect.
Magnet Specs That Actually Matter for Golf Use
Neodymium magnets come in grades like N42, N50, and N52, and the number refers to the magnet’s maximum energy product, a lab measurement of magnetic strength. Higher numbers mean a stronger magnet for the same size, but grade alone doesn’t tell you how well a magnet will perform once it’s built into a strap or clip.
Holding force, measured in pounds, and Gauss, a measure of field strength at a given distance, are the two specs that translate directly to real-world use. A magnet rated to hold 20 pounds in a lab test with flush metal contact will hold far less once it’s separated by a fabric sleeve, an angled cart frame, or a curved rangefinder housing. MagnetCy’s analysis of magnet-rangefinder interactions makes the point that contact area and mounting geometry often matter more than raw grade, since a wider, weaker magnet distributed across more surface can outperform a tiny, ultra-strong point magnet that barely touches the housing.
By the Numbers: A larger contact patch spreads the same holding force over more surface area, which is why strap-style mounts with a flat magnetic panel tend to feel more secure on a moving cart than a small, high-grade point magnet pressed against a curved edge.
Match the strength to how you actually play:
- Walking golfers carrying a rangefinder in a pouch or clipped to a strap don’t need top-grade magnets. A moderate N42 or N45 magnet with a decent contact area holds fine through 18 holes of walking.
- Cart users benefit from a slightly stronger magnet or a wider contact plate, since cart vibration and the occasional bump over a curb put more stress on the bond than steady walking does.
- Rough-terrain or hunt-use cases (bowhunters using rangefinders in similar magnetic clips) generally call for the strongest practical grade, paired without exception with a tether, since the consequences of a drop in the woods are worse than on a manicured fairway.
Pacemakers, Electronics, and Safe Magnet Storage
Magnets strong enough to hold a rangefinder in place are also strong enough to matter for anyone with an implanted medical device. Vendor safety disclaimers for magnetic clips, including guidance published alongside products like the Magnus clip, specifically warn against close contact with pacemakers and other implanted electronics. If you or someone in your group has a pacemaker or defibrillator, keep magnetic accessories at a clear distance, several inches at minimum, and avoid carrying them in a chest pocket.
Beyond medical devices, a few other precautions are worth building into your routine:
- Keep strong magnets away from your phone’s compass app and any credit cards with magnetic stripes stored in the same pocket or pouch.
- Store magnets separated from GPS handhelds and watch-based rangefinders when not in use, since prolonged close storage can cause the same drift issues described earlier.
- Treat the magnet as a convenience feature, not a security feature. A tether or lanyard should always be the backup that catches the rangefinder if the magnetic bond fails on a rough swing or a sharp cart turn.
- Wipe down magnetic contact points periodically. Dust and grit reduce the effective holding force over time even when the magnet itself hasn’t weakened.
Tethering isn’t an afterthought; it’s the difference between losing a $400 rangefinder in tall rough and simply resetting a clip that popped loose.
What to Check Before You Buy a Magnetic Rangefinder Mount
A good magnetic mount fits your specific rangefinder model, not just “most” rangefinders. Run through this checklist before you commit to a strap, sleeve, or clip.
- Confirm button and port coverage. Hold the accessory against your rangefinder’s dimensions (or check listed compatibility) to make sure the mode button, power button, and any charging port stay accessible.
- Check the magnet’s contact area, not just its grade. A wider, flatter contact patch generally outperforms a tiny high-grade magnet, especially on curved housings.
- Look for a stated magnet grade and holding force. Vendors that publish an N-grade and a pound rating are giving you something to actually compare, rather than a vague “strong hold” claim.
- Prioritize built-in tethering. A mount with an integrated lanyard point saves you from adding an aftermarket cord later.
- Ask about corrosion resistance. Golf accessories live outdoors in humidity and rain, and a magnet housed in uncoated metal can degrade faster than one sealed in a rubberized shell.
- Ask the seller directly about manufacturer guidance. Specifically: what magnet grade is used, what the rated holding force is, and whether the rangefinder manufacturer has published any compatibility notes for magnetic accessories.
- Review the return policy. Fit issues (a magnet that’s slightly too weak for your cart’s vibration, or a sleeve that blocks a button) are common enough that a straightforward return window matters.
Aiming Fluid Golf’s own magnetic accessories technology breakdown walks through how grade, contact area, and mounting geometry interact, useful background if you want to understand the “why” behind a spec sheet before you buy.
How Aiming Fluid Golf Approaches Magnetic Accessory Design
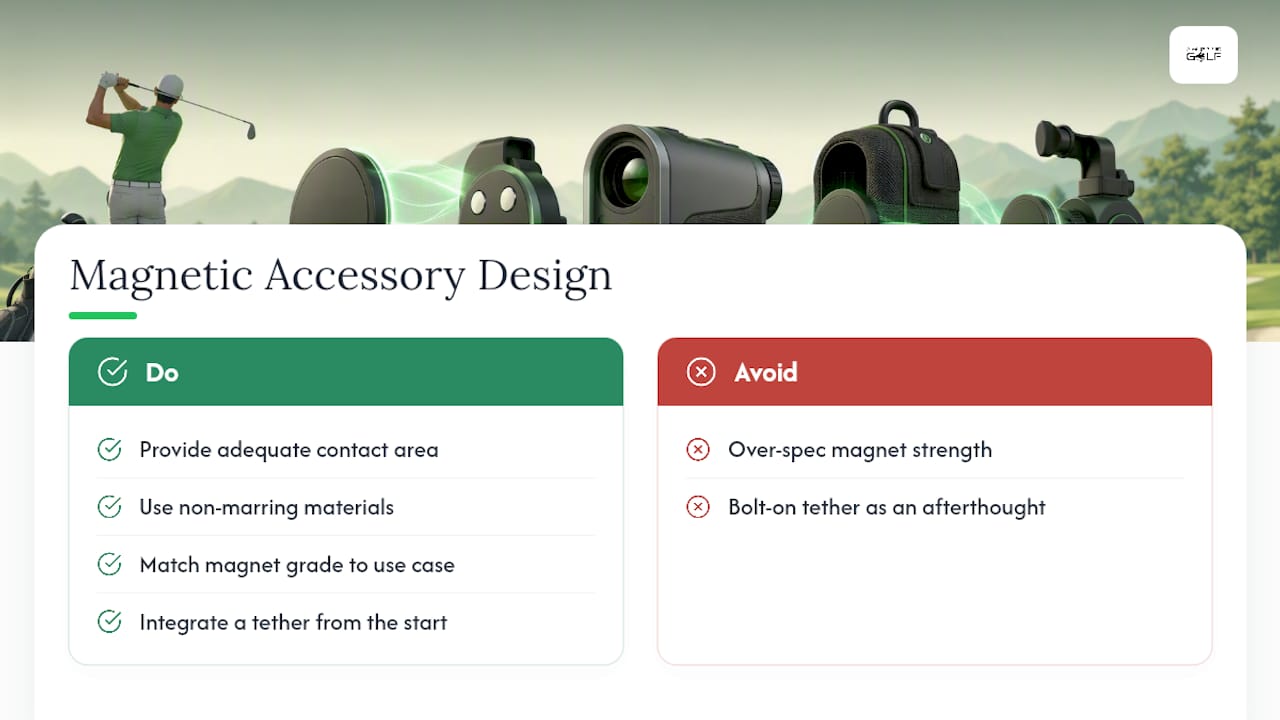
Building a magnetic accessory that holds a rangefinder securely without risking interference comes down to a few design choices, and they’re the same ones this guide has walked through: adequate contact area, non-marring materials that won’t scratch a lens housing or cart finish, a magnet grade matched to the actual use case rather than maximized for marketing copy, and a tether integrated from the start rather than bolted on as an afterthought.
Aiming Fluid Golf applies that same thinking to its magnetic towel and landing pad system. The goal isn’t to use the strongest possible magnet. It’s to size the magnet correctly for the weight and material it’s holding, so the towel or pad releases and reattaches cleanly without dragging on your bag or leaving a gap where mud and grass clippings collect. The same principle applies to any magnetic mount built for a rangefinder with flag lock and slope features: the magnet should be strong enough to hold securely through a cart ride, and no stronger than that.
That restraint matters more than it sounds. Over-specifying magnet strength doesn’t just risk sensor interference; it also makes accessories harder to remove one-handed mid-round, which defeats the entire point of a quick-access design.
The Overlooked Trade-Off Nobody Talks About
Most advice on this topic fixates on whether a magnet is “safe,” as if that’s a yes-or-no property of the magnet itself. It isn’t. The research points somewhere more useful: safety is a property of the whole system, magnet grade, contact area, distance from the sensor, and mounting design, working together.
That framing gets buried because “strongest magnet” sounds like the safer marketing claim. It isn’t. A golfer who buys the highest N-grade magnet available and slaps it directly against the housing is taking on more real risk than someone using a moderate magnet properly buffered by a sleeve or spread across a wide strap panel.
What actually deserves your attention first isn’t the magnet spec sheet. It’s the tether. Every mount will eventually fail, whether from a hard cart bump, worn-down holding force, or a magnet simply not matched to the terrain. A $5 lanyard is cheap insurance against a $400 mistake, and it’s the one step golfers skip most often because a magnet feels secure until the moment it isn’t.
— Gary
Get a Magnetic Mount Built Around Contact Area, Not Just Strength
If you’ve made it this far, you already know the checklist: right magnet grade, real contact area, integrated tethering, and a fit that doesn’t block a single button you need mid-round. That’s exactly the design brief some premium brands work from for their magnetic towel and landing pad systems and cart accessories.

Rather than maximizing magnet strength for a marketing spec, Aiming Fluid Golf builds accessories sized to the job, secure enough to survive a cart ride over rough ground, gentle enough not to fight you when you need fast one-handed access. Browse the full magnetic accessory and cart gear lineup to see mounts, towel systems, and landing pads built with the same contact-area-first approach covered in this guide, and pick the setup that matches how you actually play, whether that’s walking, riding, or hauling gear over rough terrain.
Sources
For readers who want to dig into the source material behind the technical claims in this guide, MagnetCy’s breakdown of magnet-rangefinder interactions covers sensor-level interference risks in more depth. AITE Optical’s blog on magnetic field effects offers a manufacturer-side view on device robustness testing. For real-world user experience, the Archery Talk forum thread on magnetic holster issues documents both successful and problematic setups across a range of devices.
- Strong Magnets Vs. Rangefinders: Can They Cause Damage? | MagnetCy
- Are Pin Seeking Waterproof Golf Rangefinders affected by magnetic fields? - Blog - AITE Optical
- Magnetic holster for range finder causing issues? | Archery Talk Forum


